ROCKY ROAD EASTER EGGS 2020…
Rocky Road Easter Eggs are a highlight of our Easter celebrations!
I shared these eggs on one of my very first blog posts back in 2014.
You can see it HERE. In that post you will see my sweet Grammy, who started the tradition, and you can also see my SUPER PLUCKED EYEBROWS too!!! 😉
I thought it would be fun to share an updated version with pictures for 2020!
The recipe below has been edited a bit as well, incorporating things that I’ve learned along the way.
I can’t find the molds like the ones that I have inherited from my sweet grammy, but THESE or THESE are some similar molds that you can try. I would definitely check the dimensions and make sure you get the sizes that you want.
I have a large, 2 mediums, and 3 small molds.
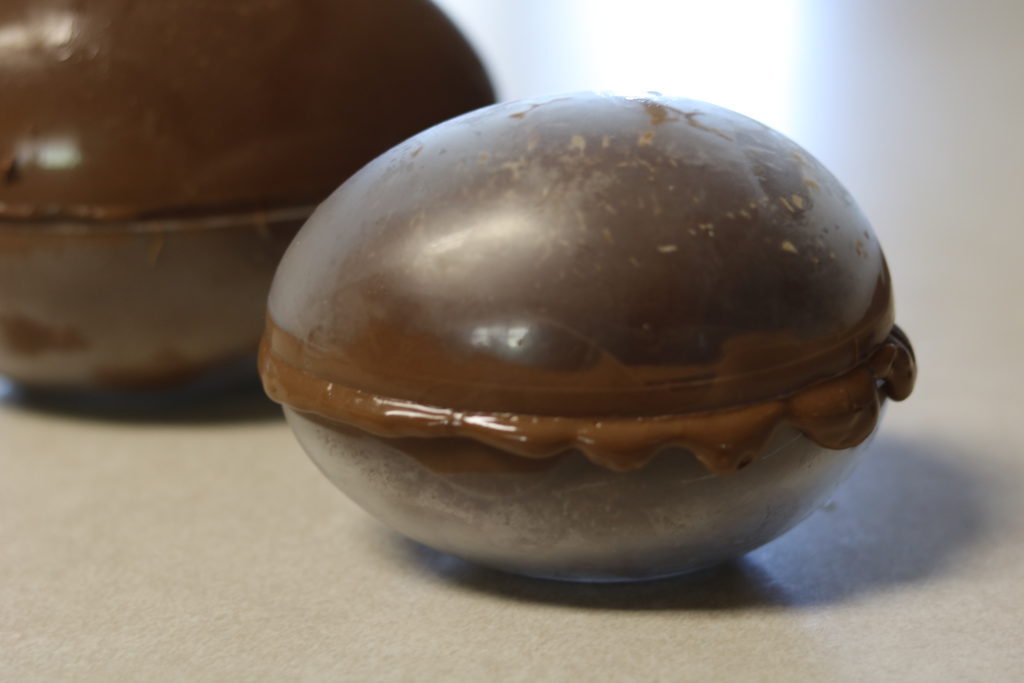
It’s okay if this happens and the chocolate spills out. I just run my finger along the side, removing as much of the chocolate drips as I can before I pop them into the freezer.

You can see that mine are not flawless, they never are.
But it doesn’t matter, and really nobody cares.
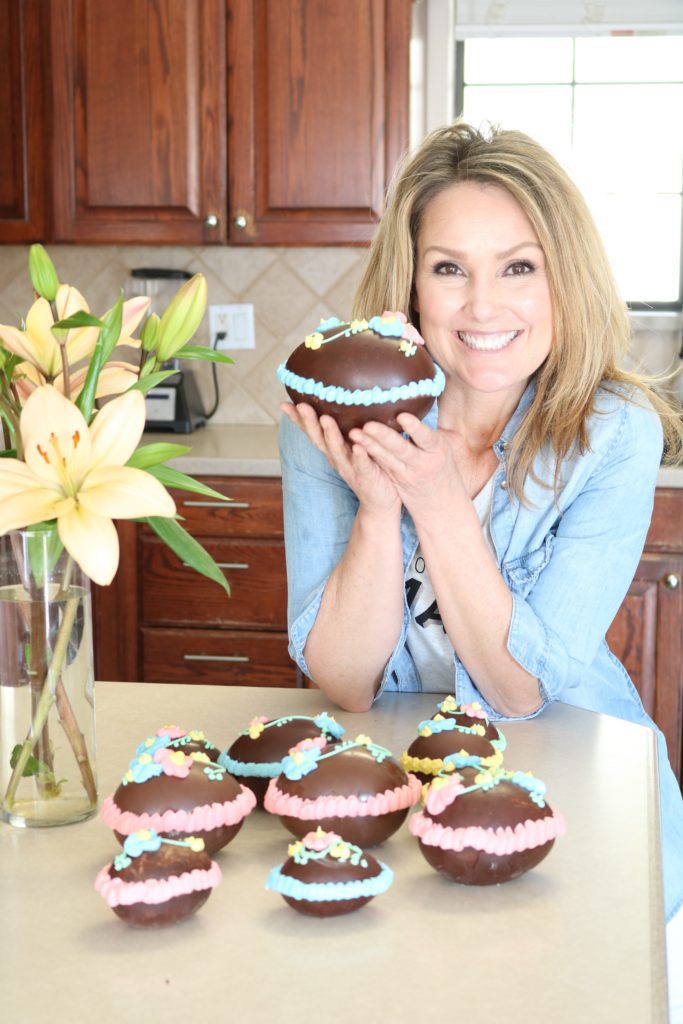
When they are decorated, and you are holding the weight of these glorious eggs in your hand, perfection doesn’t matter.
They are such a GREAT gift!
My icing this year turned out to be runnier than I like. Plus, I was trying out some new frosting tips and didn’t really know how to use them, HA!
But you know what?
Who cares.


Please let me know if you try to make these delicious and special Rocky Road Easter Eggs for your family!
Happy Easter everybody!

")
| Servings |
|
- Chocolate chips at least 2 bags, depending on how many eggs you plan to do.
- 2-3 cups mini marshmallows
- 2-3 cups chopped pecans or more
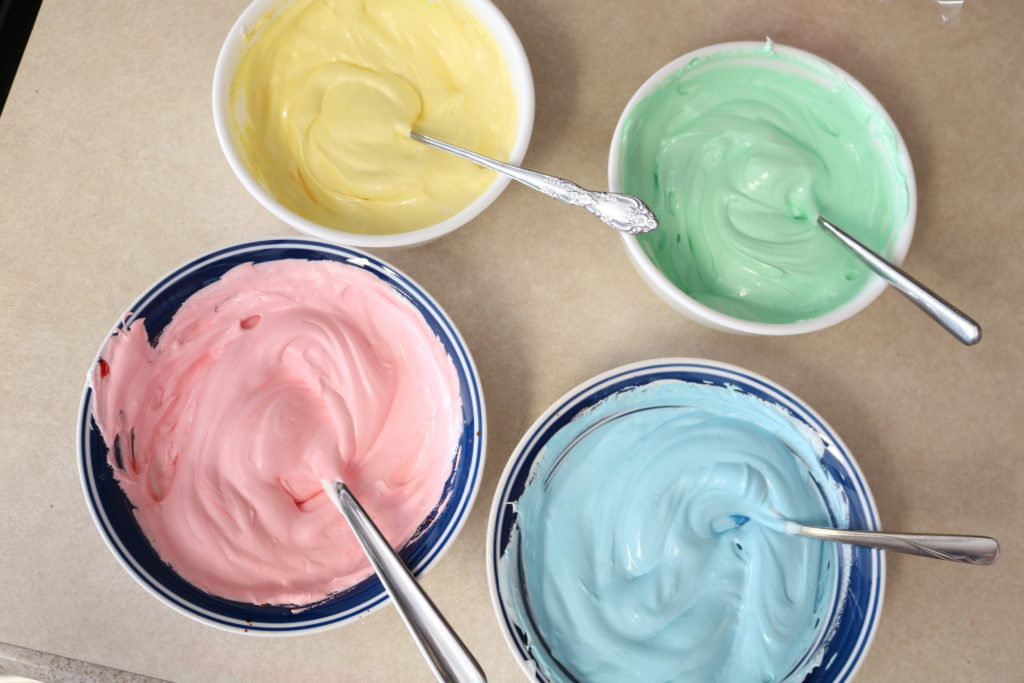
- royal icing tinted different colors
- 1 (ea.) large, medium, and small egg molds. These can be purchased at any specialty kitchen store, usually in a kit.
Ingredients
|
|
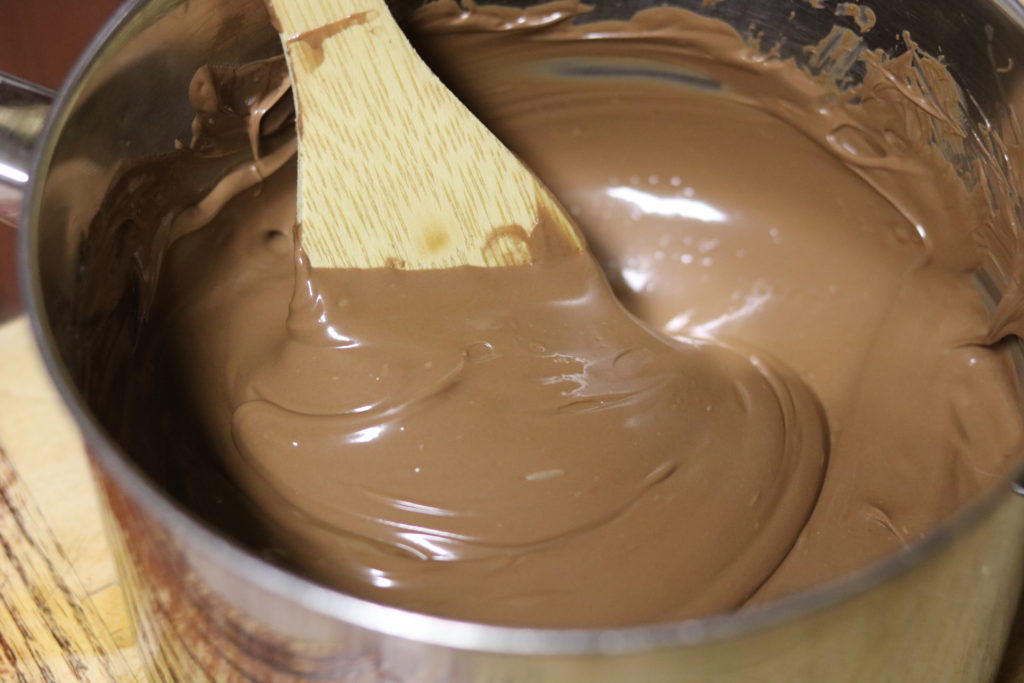
- Slowly melt about 2/3 of the chocolate from one bag over a double boiler, stirring constantly, until it reaches 110-115° . Do not add marshmallows and pecans to this! This will be the plain chocolate to coat the egg molds.
- Once the chocolate reaches the correct temperature, remove the top pan from heat and let it sit on a towel to cool until it reaches 95°-100°. Then, stir in the remaining chocolate until it is completely melted. This is called tempering, it will prevent your chocolate from getting a white discoloration.
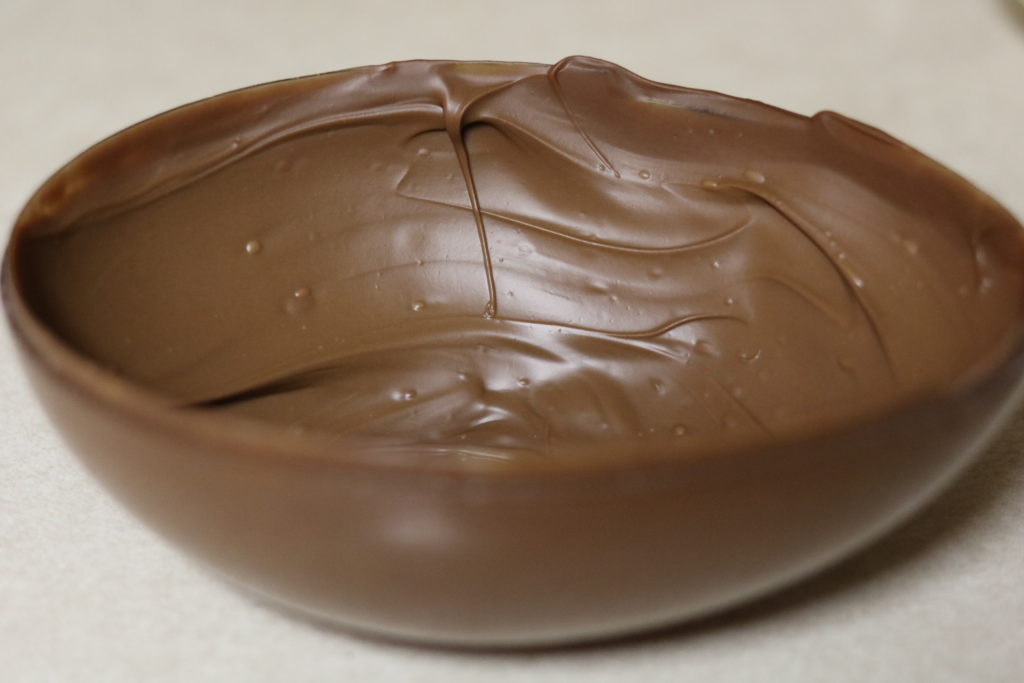
- Spray quickly, each mold with cooking spray. Then with a paper towel, wipe it around slightly to avoid lines on the chocolate.
- Coat each mold with chocolate and quickly pop them into the freezer to set the chocolate.
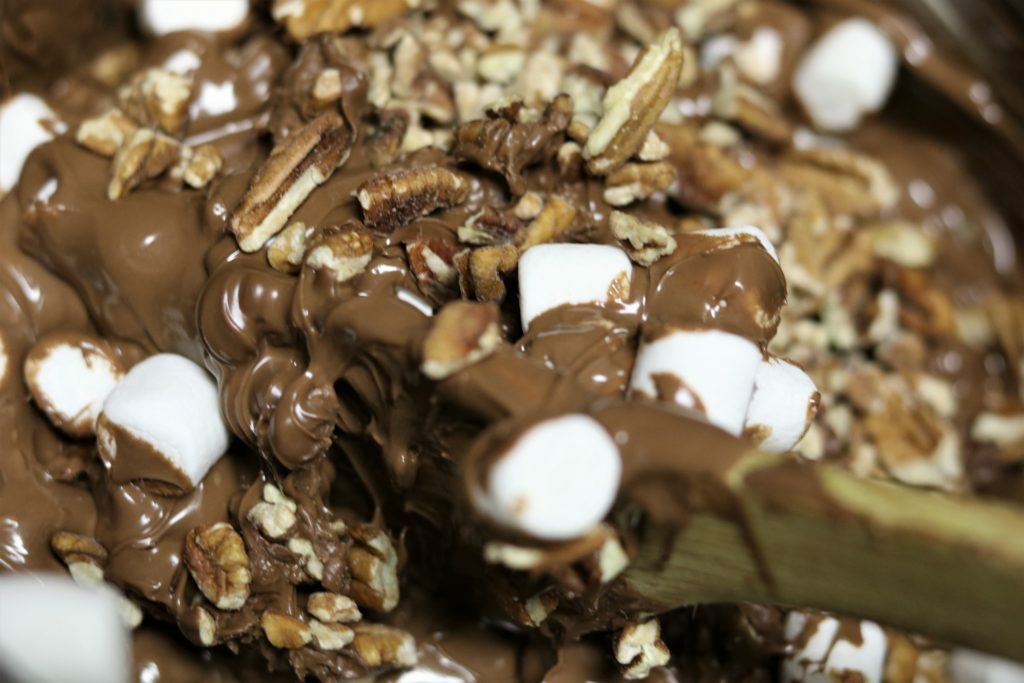
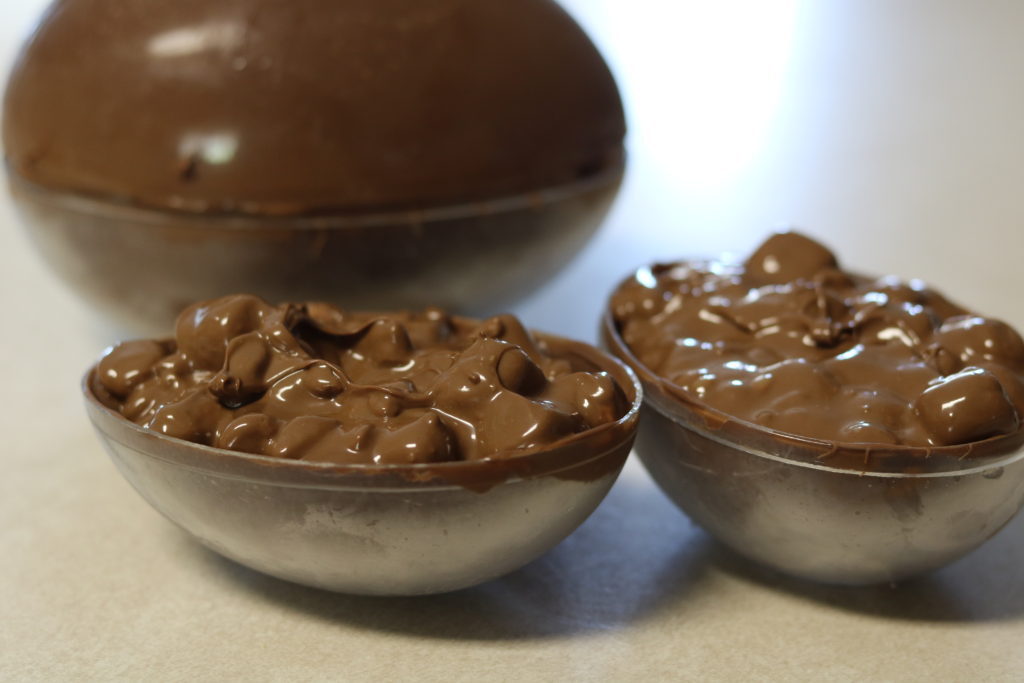
- Melt more chocolate, this time you won't need to temper it because it will be for the rocky road mixture on the INSIDE.
- Add the marshmallows and nuts, stirring until completely coated with chocolate. This is where you will need to eyeball it, adding more of either one, if you desire. I like for it to be pretty lumpy if that makes sense.
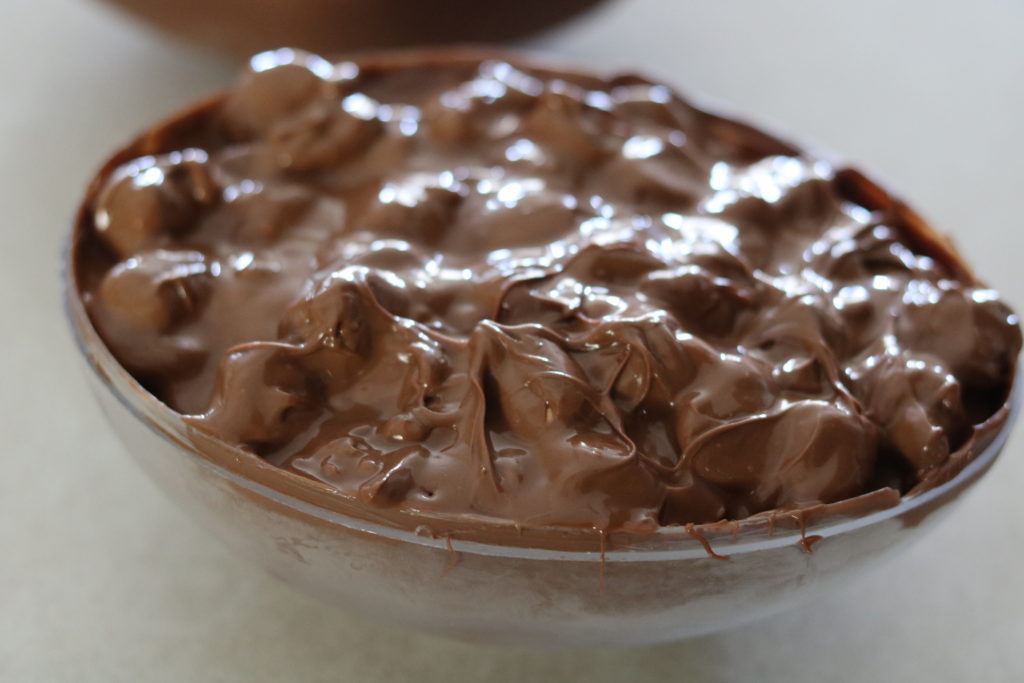
- Take out the chocolate coated molds, and fill each half with the rocky road mixture, packing in firmly to prevent air pockets. Put the two halves together and return to the freezer or refrigerator until set.
- When completely set, remove molds and decorate with Royal Icing, being sure to cover the seams.
They look so good!!
The only time I had really beautiful eggs for my children the dog ate them before the kids even got up to see them.
Oh no!!! All that work went to the dog??? How frustrating haha! It is definitely a labor of love. Thank you Ann!